video for how to install Xampp server:

The full form of XAMPP is X stands for
Cross-platform, (A) Apache server, (M) MariaDB, (P) PHP and (P) Perl.
The Cross-platform usually means that it can run on any computer with
any operating system.

The first step in setting up XAMPP: go to the Apache Friends website and download the file for the platform you are using. You will see separate download links for Windows, Linux and OS X. Note that there is no 64-bit version for Windows, but the 32-bit one works perfectly fine.
The file size is not that large (around 110MB).
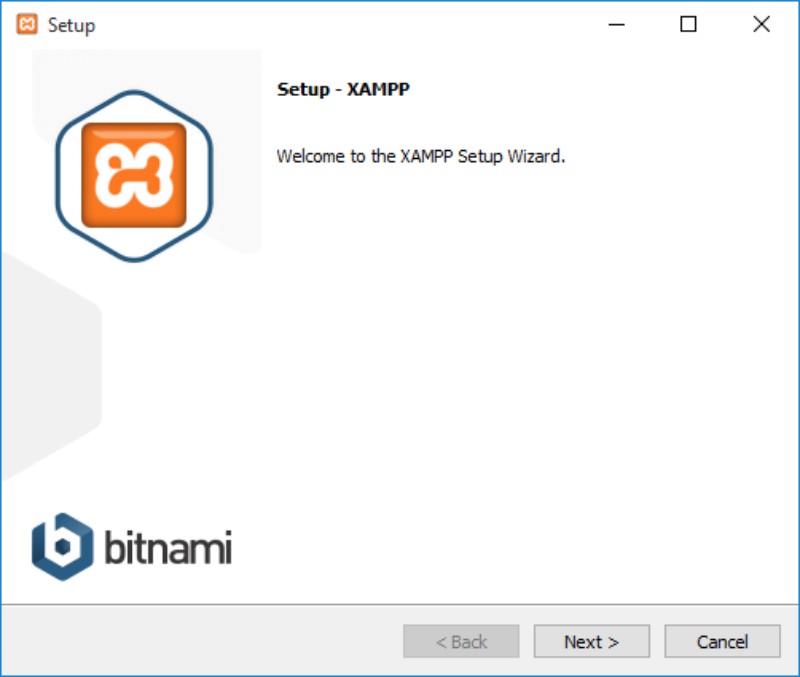
After downloading it, launch the installer and XAMPP setup will begin.
Options like Apache and PHP are required and are installed automatically. Since our goal is to host WordPress locally, you must check MySQL and phpMyAdmin boxes. You can uncheck the rest if you want to.
Next, select the folder where you would like to install XAMPP on your computer. It’s up to you if you want to create a new folder or use the default path (C:\Program Files\XAMPP).
After choosing the install directory, you will be asked to install Bitnami. The extension makes installing third-party CMS programs WordPress, Joomla!, Drupal without a hassle. In this XAMPP tutorial we will manually install WordPress, so uncheck “Learn more about Bitnami for XAMPP” and click “Next”.

Finally, after going through all those installation hassles, XAMPP is ready to install. But, wait, there’s more! During the installation, you may encounter security/firewall warnings. Make sure you check “Private networks, such as my home or work network”, and click “Allow Access”.
That will create a rule for XAMPP in your security system, and allow it to work. Now, where were we? Ah, yes!
After the installation, you will be asked if you would like to start the XAMPP Control Panel. Leave the box checked and click “Finish”. The Control Panel will now open.
Note: Before using XAMPP, check that you don’t have conflicting applications that are using the same ports running in the background. Skype is a perfect example. Exit those applications are restart XAMPP.
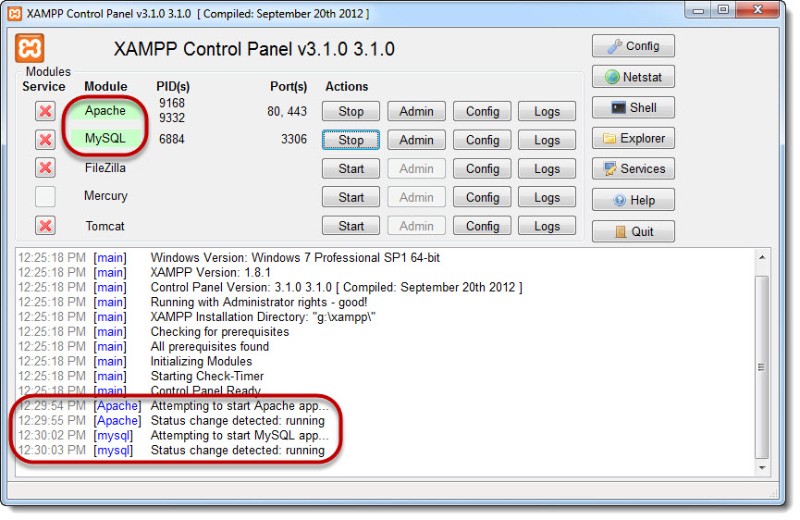
If the installation didn’t run into any errors, the control panel would show black and blue text below the list of the panel’s components (Apache, MySQL etc.). All of the elements have their separate Start/Stop, Admin, Config, and Logs buttons.
Run Apache and MySQL by clicking their Start buttons. If the components started without problems, you would see a green background behind their names. Congratulations! You have successfully installed XAMPP server on your computer.
You are now ready to install WordPress XAMPP local server.

With XAMPP up and running, it’s time to teach you how to install WordPress, but before we do that, you will need to create a database first. Open your XAMPP Control Panel and click on the “Admin” button of the MySQL section, which will lead you to the phpMyADmin page.
what is xampp server?

XAMPP is an abbreviation for cross-platform, Apache, MySQL, PHP and
Perl, and it allows you to build WordPress site offline, on a local web
server on your computer. This simple and lightweight solution works on
Windows, Linux, and Mac – hence the “cross-platform” part.
Since WordPress isn’t a stand-alone application, XAMPP provides two
essential components for its installation – Apache, which is used to
create the local server, and MySQL which you can use as a database for
your website.
Step One: How to install XAMPP?

The first step in setting up XAMPP: go to the Apache Friends website and download the file for the platform you are using. You will see separate download links for Windows, Linux and OS X. Note that there is no 64-bit version for Windows, but the 32-bit one works perfectly fine.
The file size is not that large (around 110MB).
After downloading it, launch the installer and XAMPP setup will begin.
Step Two: Initial Installation Steps
Sometimes, depending on your operating system, you may receive a security warning. Don’t worry, XAMPP is safe to install. When setup wizard pops up, click “Next”, and in the next window, you will be asked to select components you want to install.Options like Apache and PHP are required and are installed automatically. Since our goal is to host WordPress locally, you must check MySQL and phpMyAdmin boxes. You can uncheck the rest if you want to.
Next, select the folder where you would like to install XAMPP on your computer. It’s up to you if you want to create a new folder or use the default path (C:\Program Files\XAMPP).
After choosing the install directory, you will be asked to install Bitnami. The extension makes installing third-party CMS programs WordPress, Joomla!, Drupal without a hassle. In this XAMPP tutorial we will manually install WordPress, so uncheck “Learn more about Bitnami for XAMPP” and click “Next”.
Step Three: XAMPP Setup

Finally, after going through all those installation hassles, XAMPP is ready to install. But, wait, there’s more! During the installation, you may encounter security/firewall warnings. Make sure you check “Private networks, such as my home or work network”, and click “Allow Access”.
That will create a rule for XAMPP in your security system, and allow it to work. Now, where were we? Ah, yes!
After the installation, you will be asked if you would like to start the XAMPP Control Panel. Leave the box checked and click “Finish”. The Control Panel will now open.
Step Four: Running XAMPP
If you accidentally unchecked the box, don’t worry. You can go to your XAMPP folder on your computer and manually run XAMPP Control Panel.Note: Before using XAMPP, check that you don’t have conflicting applications that are using the same ports running in the background. Skype is a perfect example. Exit those applications are restart XAMPP.
If the installation didn’t run into any errors, the control panel would show black and blue text below the list of the panel’s components (Apache, MySQL etc.). All of the elements have their separate Start/Stop, Admin, Config, and Logs buttons.
Run Apache and MySQL by clicking their Start buttons. If the components started without problems, you would see a green background behind their names. Congratulations! You have successfully installed XAMPP server on your computer.
You are now ready to install WordPress XAMPP local server.
Step Five: Your First Database

With XAMPP up and running, it’s time to teach you how to install WordPress, but before we do that, you will need to create a database first. Open your XAMPP Control Panel and click on the “Admin” button of the MySQL section, which will lead you to the phpMyADmin page.


0 Comments:
Post a Comment